New Negatives
Note: I hope this in the only quasi-technical writing I ever do in the blog. I mention that because in reality, I am one of the most relaxed people there are when it comes to technique—especially when it comes to users of view cameras. I find that all too often people will fixate on technique, and let important things like vision fall to the wayside. I now only mention how I am developing my film because it will affect the way I see and photograph (it also explains why I was up until 7AM with only two hours of sleep for two nights in a row). -----------------
In mid-April I had the pleasure of being the guest of Steve Sherman during a house-warming party for his new darkroom (its the kind of darkroom that we all dream about). When I was there, I saw several prints from negatives that were developed using a technique that he breathed new life into. The technique, called "semi-stand development" basically entails placing a single sheet of film vertically in a tube, and giving it extremely minimal agitation. The results are negatives that appear extremely sharp with better separation of tones throughout the whole scale of the negative. When I first saw these prints in 2004, I was initially turned off by the "unsharp-mask" effect. I later learned from a good friend, Joe Freeman, that more frequent agitation will lessen overly sharp appearance, but will not jeopardize the ability of retaining good local contrast. Joe convinced me when he showed me prints he made on Printing Out Paper with negatives developed this way. They are some of the most beautiful prints I have ever seen.
I learned what few basics I need to know, and set out on Saturday to begin developing my new films from my trip to California this past May.
Before I could do so, I needed to make several tubes for individual 8x10-inch negatives. That was the easy part— I simply cut a 4" PVC tube down to 11-inches and cemented a cap on one end. The hard part was making the plunger that would agitate the film. Taken mostly from Joe's design, I created a plexi-glass disc and put it on one end of a threaded 3/16 rod. I then drilled a whole in a separate PVC cap, that I would place on each tube when it is time to agitate the film. My mistake was in making the plexi-glass disc to large. It scratched several of my first negatives beyond repair. I solved the problem by sanding down the disc and cutting a kitchen sponge a little larger than the disk. I then made a second disc, and sandwiched the sponge between the two plexi-glass discs. Now, if the plunger robs along the film, the soft sponge will be the only thing in contact, and will not cause any scratching.
The whole film developing process takes about 2 hours start to finish, and I can really only do 6 negatives in that time. That is 75% slower than how long it used to take to develop that many sheets! If the results of this new method were not so outstanding then I would not even think about using this new process.
I developed and printed about a half dozen of the new negatives to see if there were any problems before I develop the other 60 sheets of film from my trip.
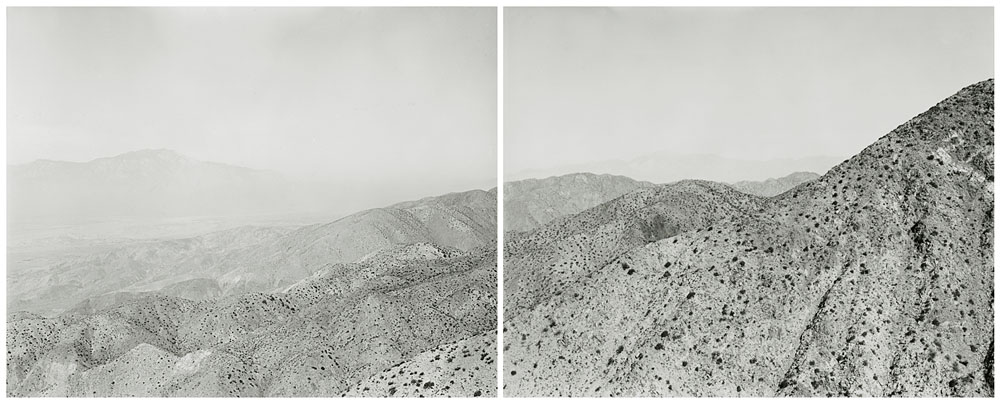
Here are two of the few that I have printed so far.
 This diptych is from Key's View in Joshua Tree National Park, and I am looking toward the San Gorgonio Pass and Palm Springs. You can barely make out 10,000 foot Mt. San Jacinto, even though it is only 50 miles away. Air pollution is causing several problems in the park, and is of major concern. You can read more about that here. The foreground hills here have a more separation than I was able to achieve in the past, and the sky shows no sign of streaking or blotching that is often a drawback to developing film in this manner.
 This picture, also from Joshua Tree National Park, shows how highlight separation (seen in the rocks in the lower right corner) can be achieved, even in harsh noonday desert sun. If for no other reason than that, I would not change from this film developing technique.